

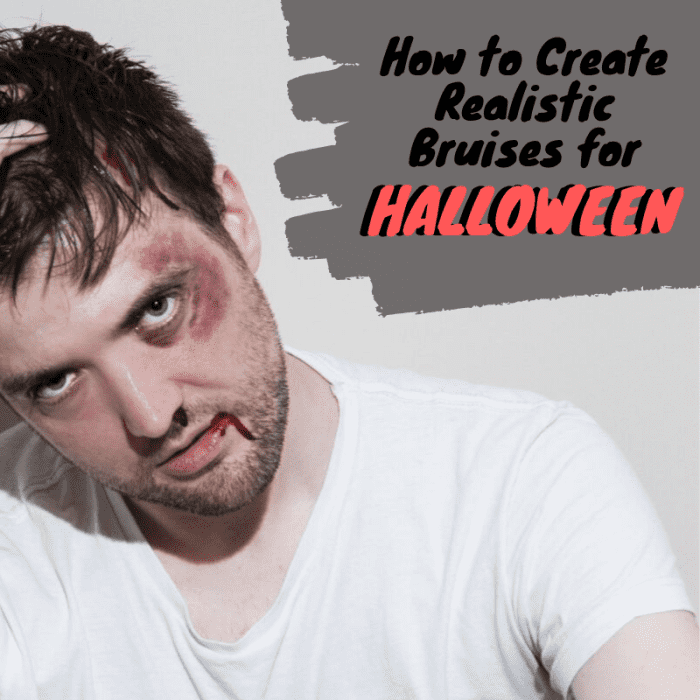
How To Make A Fake Bruise Without Makeup
I've e'er loved Halloween, but as a total-time student with a part-time job, I don't have the fourth dimension or coin to shop for high-end makeup.
It's easier than y'all think to create creepily realistic bruise furnishings using nothing but non-toxic, washable markers.
Bodie Strain, CC BY two.0 via Flickr
Why Fake Bruises?
Don't accept the time or money to shop around for professional costumes or horror makeup this Halloween? I know the feeling, friend! I live in an apartment, attend schoolhouse, and pay for both rent and college with a function-time job. Information technology's difficult to make ends encounter, and I rarely have any excess money for costumes and brand-up. I do, all the same, beloved Halloween.
Final-Minute, Depression-Low Cost Halloween Effects
Through years of experience, I've learned to make exercise with whatever I take at my disposal to ensure I expect awesomely spooky during my favorite fourth dimension of the twelvemonth. Fancier costumes cost manner too much money, and all you actually need to go as a zombie or ghoul is some one-time dress and a few markers!
This is an easy tutorial that anyone, including children, should be able to follow. Fake bruises are one of the cheapest, easiest, and quickest furnishings you can create at home right before going out. If anyone is interested in something a little more complicated, let me know!
Supplies
- Nontoxic, washable markers
- Your skin (for the purpose of this demonstration, I used my hand)
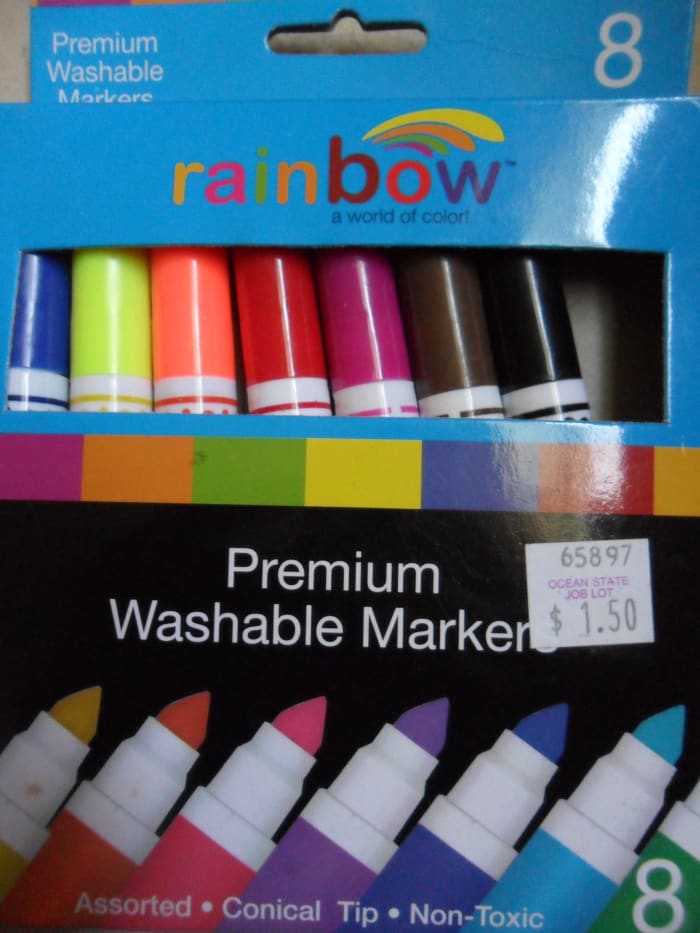
These are the non-toxic washable markers I used for this tutorial. Blue and red are the simply colors y'all volition need.
Instructions
Now that you lot've got your markers, you're set up to commencement creating your own haunting Halloween bruise furnishings! Before get-go, double-check that y'all're using washable, not-toxic markers. The inks from other types of markers tin harm your skin. Delight, utilise mutual sense.
i. Select a Location for Your Fake Trample
In this tutorial, I will be showing yous how to create a bruise on your wrist, but this same process volition work anywhere on your body. You tin can follow these steps multiple times to create bruises on different areas of your body.
I practice non suggest trying this on areas where y'all accept a lot of pilus. Unless you shave the area, the bruises you create will be difficult to see. Coloring over pilus is also a expert way to quickly kill cheap markers.
2. Create a Light-Blueish Base of operations Colour
The start thing I like to do is build color. For best results, start with a low-cal blue color. A darker primary blue marker will work ok, simply yous'll need to piece of work harder to get the same event.
Brainstorm by lightly coloring the skin where you lot want the bruise to be. As you color, employ your finger to rub the ink into the skin. This will assistance it blend with your natural skin tone. This start layer shouldn't create major dissimilarity with your skin. Your goal is to make a faint trample shape for you to follow equally you continue.
If you're using a darker bluish marker, colour a spot on your skin well-nigh the size of a dime, then vigorously rub the ink in a circular move to blend information technology until information technology'due south faint. Repeat this process on adjacent areas until you have covered the total area you desire to serve equally your bruise.
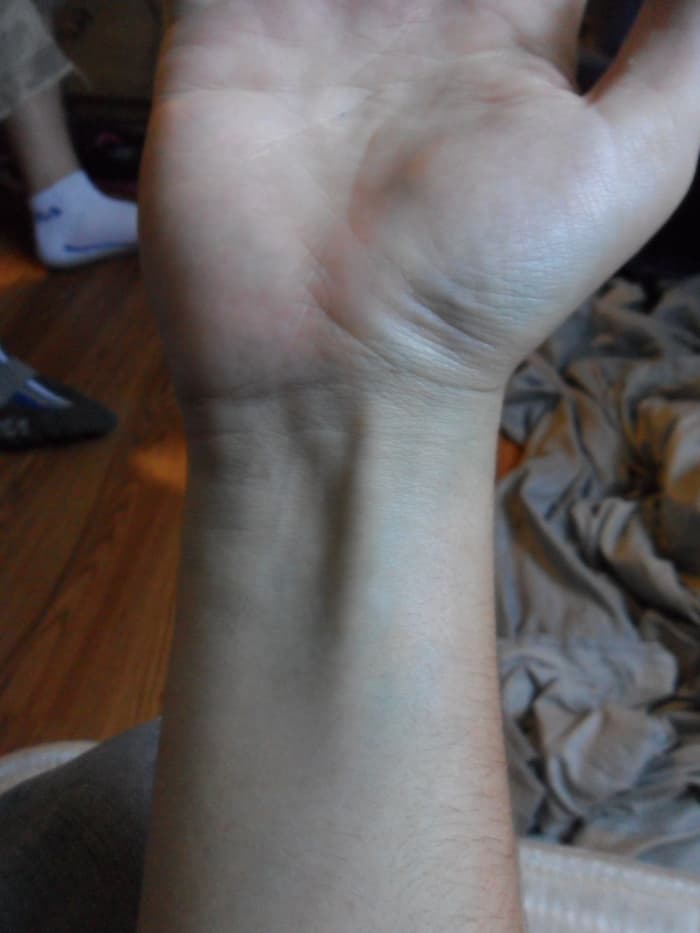
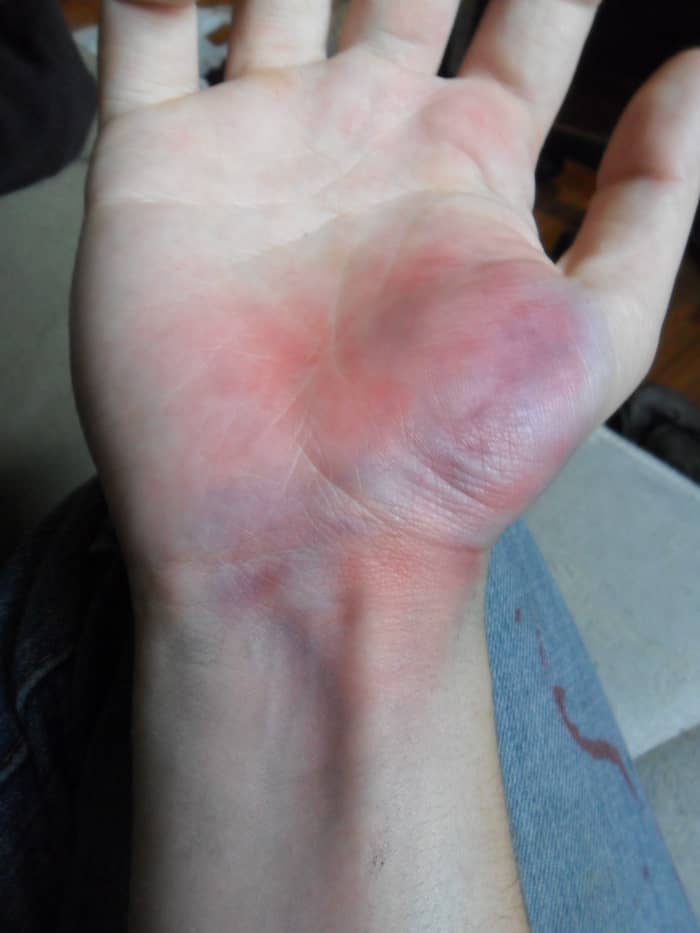
You can encounter the area effectually my wrist is at present a nice sickly blue. I likewise got a little creative and started going up my palm.
3. Alloy Some Ruby in With the Blue
At present we're going to fill the same area in with red. Echo the process from step two, merely now utilise a cerise marker. Feel gratuitous to color a larger expanse than you did with the bluish. At this point, the blending gets a little more than difficult, so I like to take a damp washcloth corner and use the wet to help blend the two inks.
Don't be afraid to allow the blue and cherry-red blend together. Aim for a nice, splotchy mix of purple, red, and blue coloration. Be conscientious to not over-alloy, or else your overall design will be also faint and won't look very striking. On the other hand, try not to under-blend, or your bruise won't look equally realistic.
Curlicue to Go on
Read More From Holidappy
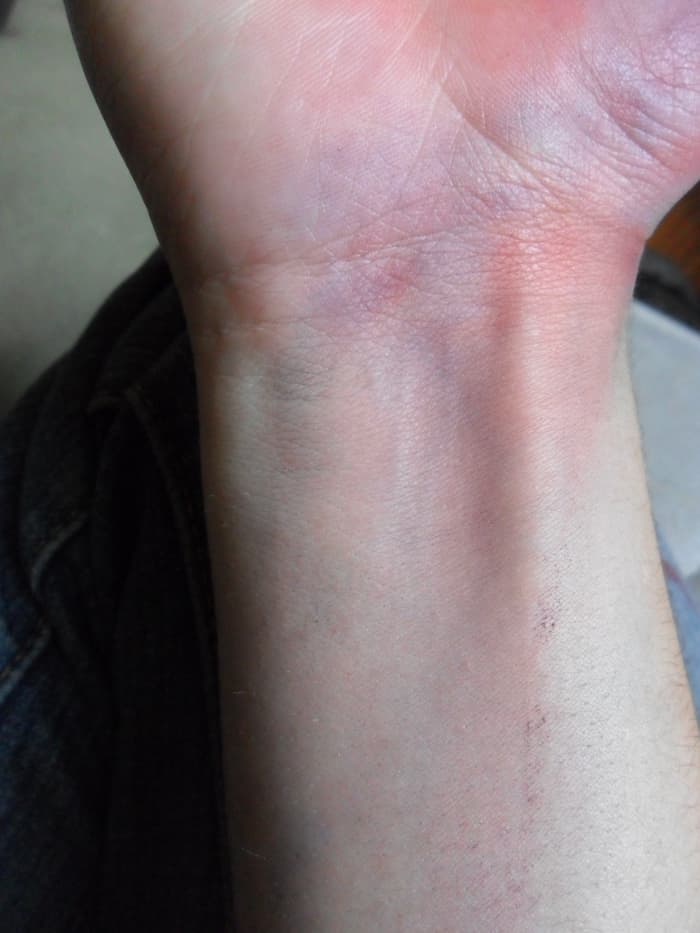
After adding blending some red into my base layer, my wrist now shows a spotty mix of imperial, red, and blue.
4. Add Some Dark Blueish to a Few Small Areas
Now catch a dark blueish mark. Select sure areas that you want to pop out a little more than, and colour them with your dark bluish marking. The areas yous color should be no bigger than the size of a dime.
Since the pigment y'all are using is darker, information technology volition be more hard to blend than the light bluish and the red. Use the damp washcloth to the night blue areas while the ink it still wet; practice this immediately later on you're washed coloring them. If yous wait too long, the dark blueish ink won't blend as nicely. I like to look at reference pictures of bruises while doing this to assistance understand how they color naturally.
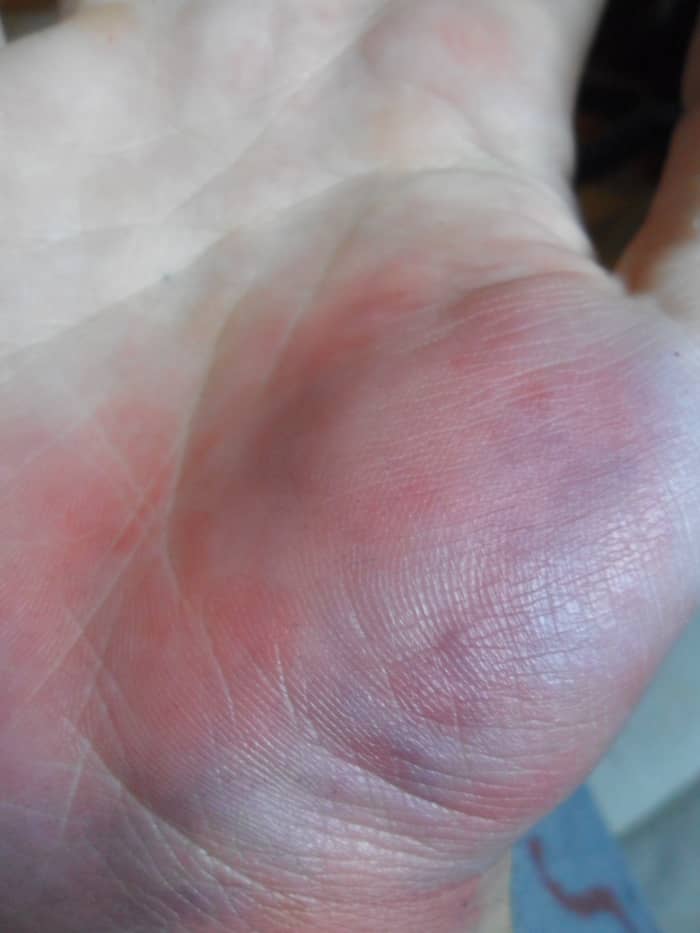
Now that I've added the darker bluish to few areas and blended it with my base of operations layers, the overall expect of the bruise is more than dynamic.
5. Add together Some Highlights and Finishing Touches
Spend some fourth dimension adding ruddy, blue, or other colors wherever you lot feel they are necessary. Looking at a reference prototype is a wonderful way to keep y'all headed in the correct management. Bruises come in many colors!
I tend to stay abroad from the color blackness, as information technology doesn't normally announced in natural bruises. If you're going for a "black and blue" trample, be sure to blend the blackness in advisedly. Information technology's very like shooting fish in a barrel to overdo it, and you might air current up with a tacky-looking issue.
The balance is upwards to you, then blend until you're satisfied, and be careful non to go overboard—sometimes less is more than.
For a more realistic outcome, taper your carmine colour off slowly then it becomes fainter every bit it moves away from the bruise.
I hope this tutorial has helped yous create some stunning fake bruises. This type of fake bruising besides makes a great foundation for other Halloween makeup effects. If you lot're short on time and money this October, only experiment, be creative, and accept fun!
Samantha on June 08, 2020:
I tried this, and if y'all add a bit of greenish and yellow, it gets even more realistic!
lolo on May 23, 2019:
i did this already expert to know others no
It's Astonishing! on February 01, 2019:
I tried this, and I merely got a crimson shade but it looks expert! Also, Welcome to Hubpage!
mvaivata on January 29, 2012:
And then gross... nevertheless... and then absurd! I am so gonna add together this to my side by side costume. Thank you!
bschnabel (author) from Vermont on September 28, 2011:
Cheers Susan! Much appreciated!
Susan Zutautas from Ontario, Canada on September 28, 2011:
Very absurd! Welcome to HubPages.

How To Make A Fake Bruise Without Makeup,
Source: https://holidappy.com/holidays/How-To-Halloween-bruises-using-marker
Posted by: newmancartheindfar.blogspot.com
0 Response to "How To Make A Fake Bruise Without Makeup"
Post a Comment